
Recently, we covered the capabilities and impact of Flows, our new customer journey enhancement tool designed to maximize LTV. In this post, we’re excited to share a step-by-step breakdown of how to design and structure your Flows.
Ultimately, this can allow you to create the best possible customer journeys for your subscribers while increasing efficiency for your business.
What are Flows templates—and what do they do?
Included as a part of Recharge Subscriptions, Flows comes with several pre-built templates designed to help you get the most value out of your recurring customers. A few of these, available in our Early Adopter Program, include:
- The Surprise and Delight Flow: Boost customer retention by proactively offering incentives such as free gifts, then A/B test different strategies to identify the most impactful approach.
- The Targeted Upsell Flow: Elevate customer LTV and AOV by offering discounted products at strategic points in the customer journey.
- The Active Churn Recovery Flow: Use customer cohort and order data to create churn reduction strategies, such as targeted cancellation reasons and winback tactics.
Moving forward, we’ll continue to add more templates, including an option for you to easily build any flow you like from scratch.
3 steps to designing and structuring a Flow
Looking to create a customized Flow of your own? Now, let’s break down the three phases to designing and structuring a Flow to spark inspiration for your own automation and personalization efforts.
Step 1: Discovery & exploration with pre-flow analysis
The first phase in creating a custom Flow is assessing your current performance. Look for scenarios where you can apply Flows to maximize LTV and efficiency, reviewing your Recharge Analytics dashboards for any cues or trends.
Here, you may want to review how your checkout transaction volume compares with recurring order volume. We also recommend reviewing the order sequence charge under the Revenue KPI tab to identify your areas of greatest churn. These are just a few places to start—the possibilities here are endless. Be sure to carefully review your data to tailor your plan to the needs of your business.
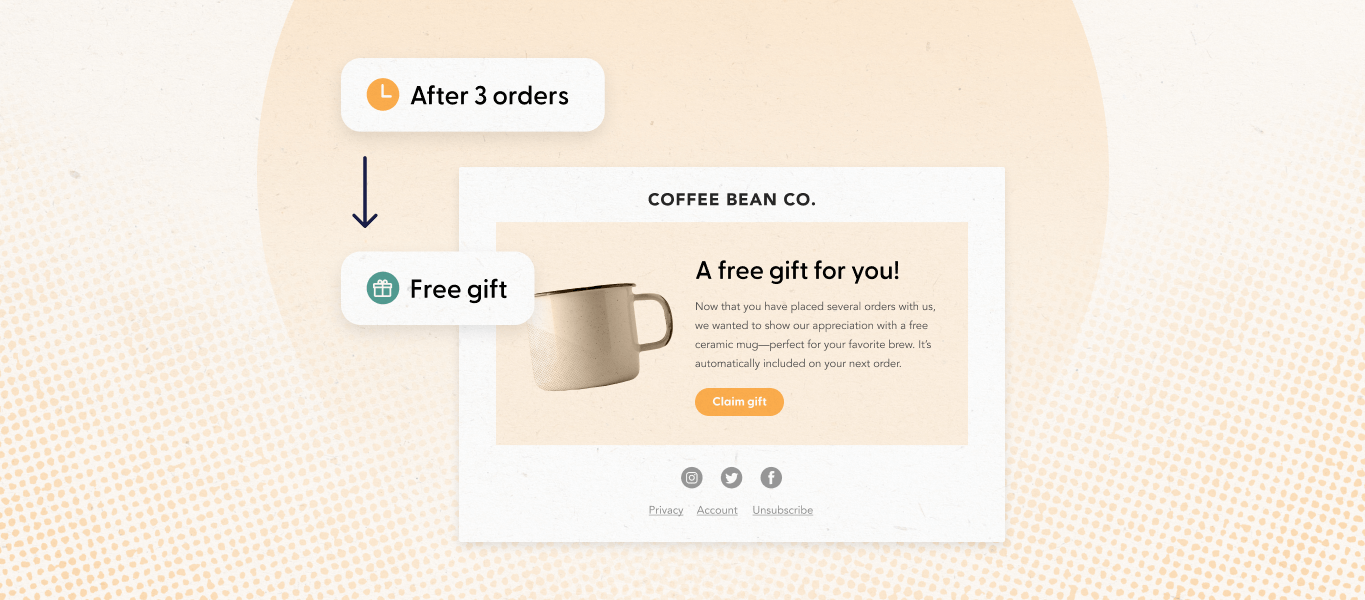
From there, create a hypothesis you’d like to test with your Flows. For example, if you’ve identified that your customers most frequently churn after their fourth order with you, you might hypothesize that by sending them a free gift after their third order, you can reduce churn by a certain percentage.
Be sure to identify any key performance indicators (KPIs) that correspond with your hypothesis, using a framework to categorize any metrics you want to focus on. For instance, you could employ an AARRR metrics framework, looking at acquisition, activation, revenue, retention, and referrals, to track behavior across the customer lifecycle.
Note: Since Recharge powers recurring transactions, here, we mainly focus on increasing customer lifetime value (LTV). After all, recurring revenue and repeat customers are the lifeblood of subscription businesses. This makes it crucial to ensure you’re doing all you can to encourage them to stick with you in a highly competitive market.
Step 2: Flow setup & monitoring
After the discovery phase, the next step in establishing your Flows is choosing a flow type: basic, A/B testing, or conditional split. From there, you can set up your triggers, conditions, metrics, and results.
Here, it’s key to look at the lowest-hanging fruit. When tackling complex ideas, it can be tempting to design an intricate experiment. However, for maximum efficiency and impact, look for the simplest way to run an experiment that can validate just one part of your idea—the minimum viable experiment.
Run this experiment to quickly gain data or insights that either give you the green light to continue to more complex implementations, OR flag any issues early on so you can pivot your strategy as needed.
There are two simple steps to set up a Flow:
- Set up the trigger component to pull your customers into the Flow after certain milestones, such as a first recurring order or after a streak of orders. Flows also comes with pre-built triggers based on merchant feedback.
- Implement your triggers and conditions—you identify your segmentation and condition.
Here’s an example of how you can use a hypothesis to design a Flow. Let’s say your research tells you that the primary reason for cancellation is “too much product.” Your hypothesis might be that you believe you can reduce your churn rate on your 30-ounce kitty litter by incentivizing customers to skip their next shipment instead of canceling their subscription.
Here, the trigger would be cancellation, the condition would be the 30-ounce kitty litter product, and the action would be to present a CTA to skip.
Step 3: Post-Flow analytics
After running your Flow, analyze its performance. If you chose an A/B test flow, look at the metrics of how your A/B test performed and see how this compares to your original hypothesis.
If the results are flat, evaluate the four components of the experiment separately to understand the true cause:
- The data: Was it correctly interpreted?
- The hypothesis: Has it actually been proven or disproven?
- The execution: Was your chosen solution the most effective one?
- External factors: Has something else skewed the data?
If necessary, you can then adjust your Flow for the future to more effectively tackle the issue.
Continue testing & iterating with Flows for maximum results
Testing and iterating on your Flows should be a continuous process. By repeatedly refining your efforts over time, you can deliver the best possible experiences for your customers, even as your offerings change.
Flows is continually being released to additional cohorts of merchants. To learn more about implementing Flows, visit our support documentation—and get started today to maximize your LTV and subscription revenue.